Friday, January 9, 2015

Current Skin Care 2015

Since it is the new year, I decided my skin was going to be one of my resolutions. Getting great skin takes time, as well as trial and error with products! So here are the things I am currently trying out this new year for my skin! 


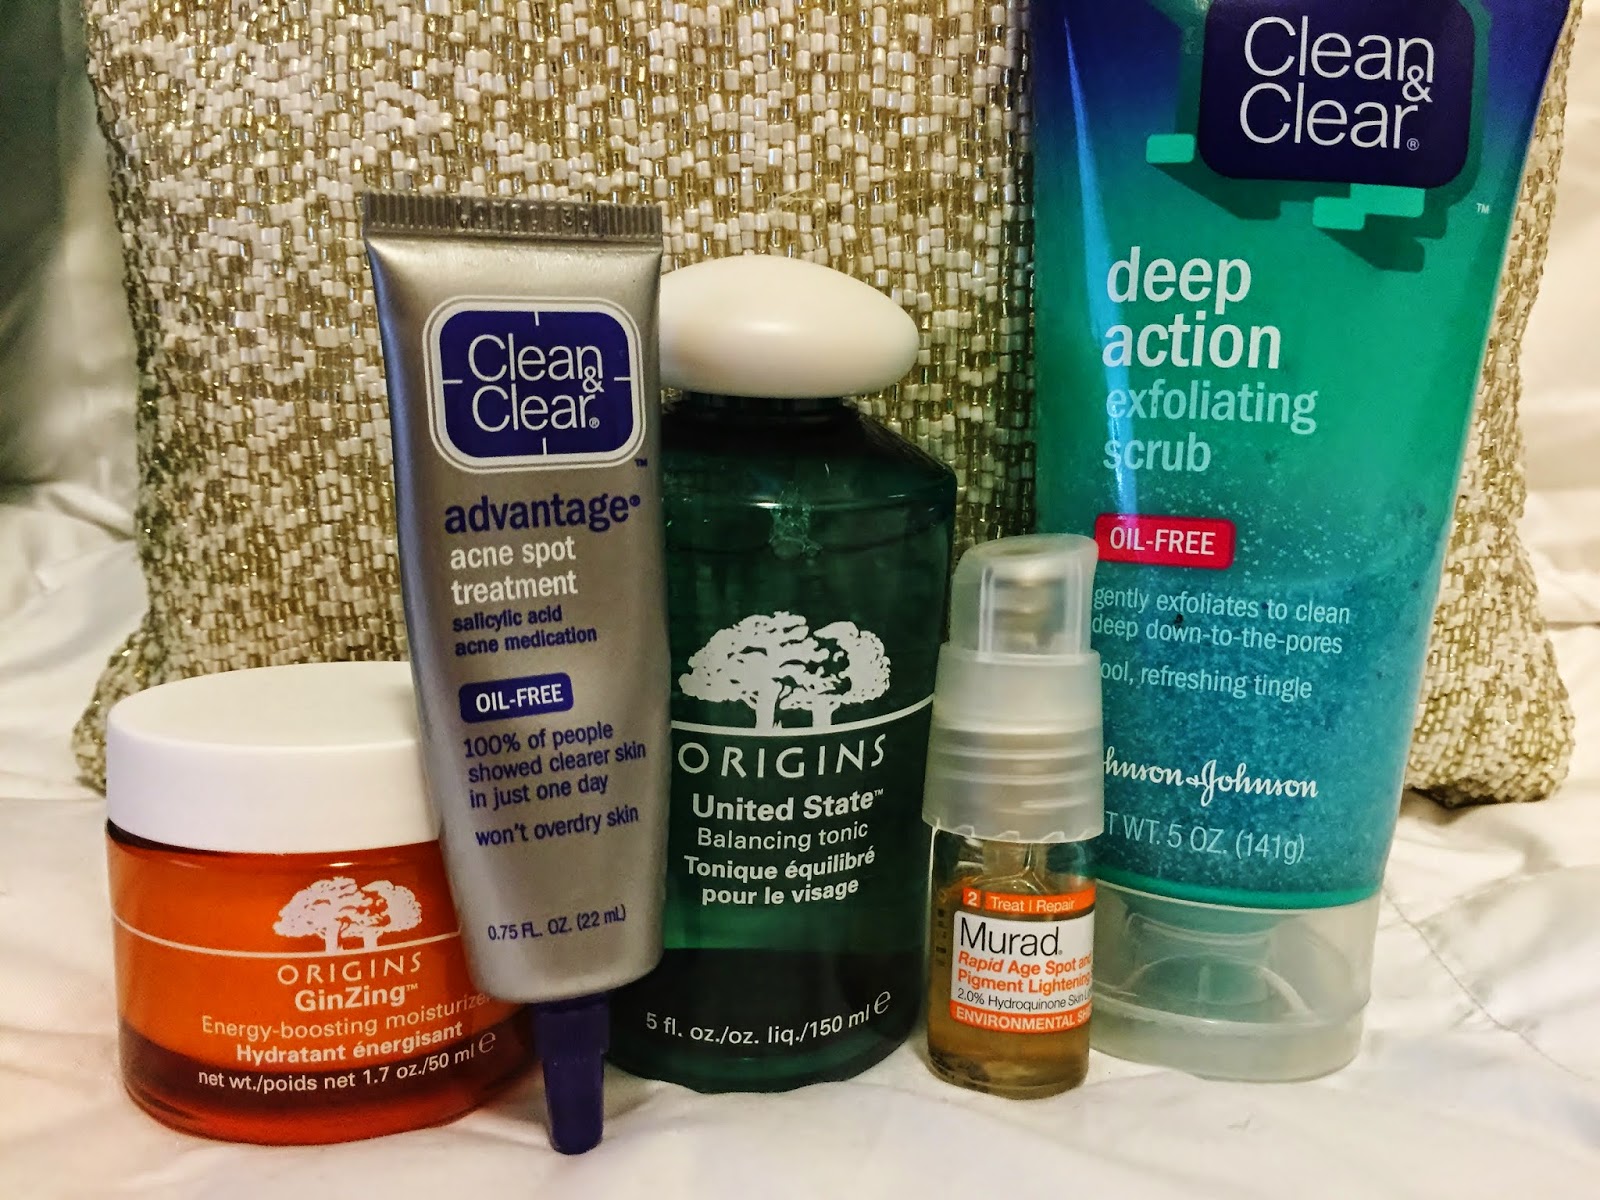
 So here are all of the products I use on my face, morning and night! I used to use different products in the morning, and at night, but found that was not working for my skin. So I decided to give my skin some consistency and get a routine! 

First of all I want to talk about my cleansers, and spot treatment from the drugstore. These are the only products I use that are NOT high end, and I'll tell you why!


So to start, you DON'T have to spend a fortune on your cleansers and makeup removers! A cleanser is on your face for a total of what, ten seconds? So why spend a bunch of money on something that has no lasting effect on your skin? You just want to make sure that the cleanser you are using is removing all of your makeup, or anything that is on your skin throughout the day. I am enjoying this particular cleanser because it is exfoliating! I have very dry skin in the winter time, and I find that if I use a cleanser that is just cream, it doesn't remove that little excess dry skin. Some of you may not want to use an exfoliating cleanser every day, but for my skin, it just works!!

Also, if you are finding that an exfoliating cleanser just isn't quite doing the job, use a sugar and coconut oil mixture once a week to really buff all that dry skin away! I love using this combo when I'm feeling EXTRA SCALY! LOL

Secondly, the Clean&Clear Spot Treatment is a favorite of many, because it simply WORKS! But if you have Cystic Acne like me, this WILL NOT HELP! I only apply this to small pimples that I get, that are not cystic. If you need to know more about why this does not work for cystic acne, you can research the causes and treatment of cystic acne. But this product works great for the average pimple!!


My Second cleanser I use is COCONUT OIL! Believe it or not, this is the best cleanser I have ever used, and it completely removes ALL OF MY MAKEUP! I just put a small amount in my hands, emulsify it, and start massaging it on to my DRY face. Using circular motions until all my makeup starts to break down, even my EYE MAKEUP! After you've massaged your skin for a while, lay a HOT cloth over your face to really pull the oil out of your skin, then simply wipe it all away!! This leaves your face clean, makeup-free, AND moisturized!! This is a great way to get all the jobs done in one, if you are a little lazy, or just don't have time for a full skincare routine! 


Now, we all know that just using good skin care is not going to magically make your skin amazing. It all starts with what you put INSIDE your body on the daily! So, always keeping a water bottle with you is such a great thing for your skin! Keeping hydrated will not only improve the look of your skin, but also helps with anti-aging! 

Also, taking a multivitamin, or Vitamin A! This is so important, and a great habit to get into!I take Vitamin A every morning with a glass of water!


 After cleansing your face comes the very important part. Now is the time to really replenish your skin with GOOD THINGS! This is where I like to spend a little more money, and get things that will really help my skin..

To start I have been using the Origins Balancing Tonic Toner! I just put a little bit onto a cotton round, and swipe all over my face. This toner helps balance the pH levels in your skin, fixes any pigmentation issues or acne spots, as well as helps moisturize the skin. This particular toner has NO ALCOHOL which is ideal for my skin, since I already have dry skin. Alcohol toners really strip the skin of all the natural oils, which is good for those who have very oily skin, but for me it just dries my skin out.

Second, is my Moisturizer. This is the Energy Boosting Moisturizer from Origins. I have just recently started using this product, but I am LOVING it so far. The smell is amazing, and it really locks in the moisture in my skin!

SIDE TIP: Another way to give your skin some moisture is a Humidifier while you're sleeping! This balances the moisture levels in the air, leaving your skin plump and refreshed when you wake up!! 


Now onto any Serums. I am currently using this Murad Pigment Lightening Serum Sample I received from Sephora. And I'm LOVING it so far! The full size is very expensive but if you have any pigmentation issues, or old acne scarring, this is for you! I've only been using it for 4 days and have already seen a difference! I will absolutely be purchasing the full size when I run out of the sample!


And lastly, about once every 2 weeks I like to use a facial mask. If I feel I need something very intense I use this Aztec Secret Indian Healing Clay. This stuff is amazing at really pulling everything out of your skin, and refreshing it. But if I am feeling good about my skin, I love to use the individual masks you can get from the drugstore or ULTA. They give my skin a nice feel, and it's like a mini spa day! :)

What are your skin care secrets??


Monday, January 5, 2015

2014 Makeup Favorites

Here are some of my top 2014 makeup favorites! I've been loving these products and I know I will carry them into 2015!


Urban Decay Naked2 Basics - This has been SUCH an amazing pallet so far! I own the Naked 2, and the Naked Basics pallets and use them every day, and this definitely joined them. I've found myself using all three pallets daily!! Urban Decay shadows are by far my favorite, and I would HIGHLY recommend this one to you, plus its less than $30! 


Mac Matte Lipstick Smoked Purple - This lipstick is ESSENTIAL for the colder months. I love a matte lip, but sometimes they can be very drying during the winter months. This particular formula is AMAZING. I don't find it uncomfortable to wear, and you can really change the color with how much you apply. It ranges from a grey/nude purple if you only dab it on your concealed lips, to a very deep smoky purple when you build it up. The pigmentation is amazing, and definitely worth every penny!


BareMinerals Original Foundation(Medium Tan) - I LOVE using this for my contour/bronzing! During the summer time when I am self tanned, this is the color I use all over my face for foundation, but since I am extremely pale in the winter this is my perfect shade for contour/bronzing! I highly recommend using a color you know works for you when you are tan to contour with, this will help make your contour look more natural! 


Mac Mineralized Skin Finish(Soft & Gentle) - This is the PERFECT glowy highlight. I love using it on the tops of my cheekbones, my cupids bow, down the center of my nose and my chin, to give the perfect healthy glow! It's not too overpowering or glittery, but gives your skin a healthy glow during the winter! During this time of year my skin get very dry, so I need something to put some life back in my skin and make it appear supple and bright!


Mac Pro Longwear Concealer(NC15) - This is the perfect under eye concealer! If you have a problem with dark circles or just want a flawless/highlighted under eye, this is the product for you! It blends flawlessly, and after being set with a loose powder, will last all day!


Anastasia of Beverly Hills Dip Brow Pomade(Dark Brown) - Now, I know everyone went crazy over the Brow Wiz, but I personally like the control I have when using an angled brush rather than a pencil. If you are having trouble getting a precise line with a pencil definitely give this a try! Using an angled brush makes it easy to get a precise line with out having to go over it a hundred times. This is definitely for those who love statement brows!


Mac Paint Pot(Painterly) - I've been using this for YEARS, and have never found a better eye shadow base/primer. This is perfect if you have some discoloration in your eye lids, or just want your eye shadow to last longer without creasing!


Morphe Eyeshadow Brushes - These brushes have came as such a surprise to me! They are extremely affordable, but AMAZING quality. YouTube beauty guru Jaclyn Hill has paired with Morphe and has talked a lot about these brushes and eyeshadow so I decided to give it a try! They are absolutely amazing. If you are looking to save a little money here is a coupon code for the Morphe Website! Just use the code "JACATTACK" at checkout!


Wednesday, December 3, 2014

How To: Cut Grapefruit so it's easy to eat!


Grapefruit is so incredibly good for you, filled with antioxidants, and so much more. Eating 1 grapefruit a day was proven to reduce LDL Cholesterol by 15%! Grapefruit also helps improve your skin and heart health! But we all know it can be a pain to eat!
 
It's difficult to scoop out the meat with a spoon or fork, squirting juice all over the place, all for something that has a bitter flavor. This really used to make me not want to eat it, but then I discovered an easy way to cut and prepare my grapefruit that makes it easy! And no mess!!
 
Start by cutting BOTH ends off your grapefruit, then using a knife, simply carve away the outer skin. This leaves you with a big ball of grapefruit meat! Cut into small bite size pieces and your done!
I like to store my grapefruit in a container, sprinkled with a little sugar!
Enjoy!


Wednesday, November 19, 2014

Christmas Decor in an Apartment!


It's the Holiday Season!! I know it's not even Thanksgiving yet, but it seems like everyone is getting a head start on the Holidays this year. Decorating your home for the Holidays is one of the most nostalgic and heart warming activities, but it can be difficult for those living in a small apartment to get the same back home feel. It's hard to decorate an apartment in general just because of all of the rules you may have to abide by, such as not drilling holes in the wall to hang things, or painting the walls. In our case our apartment was already painted when we moved in...honestly I would rather have all the walls white, but that was not my choice. So I'm stuck with a medium warm toned tan color..yuck. So decorating can be difficult, but luckily I found the perfect Holiday decor to match our wall color and our personal style! All at a decent cost! In this post I'm going to be listing all the items we bought, and (estimating if I don't remember) how much each item costs! Hopefully this gives you some inspiration and an idea of how much money you may have to spend! Keep in mind this was our FIRST Christmas/Holiday Season we had to decorate our own apartment, so we were starting from scratch! 
Enjoy:)  

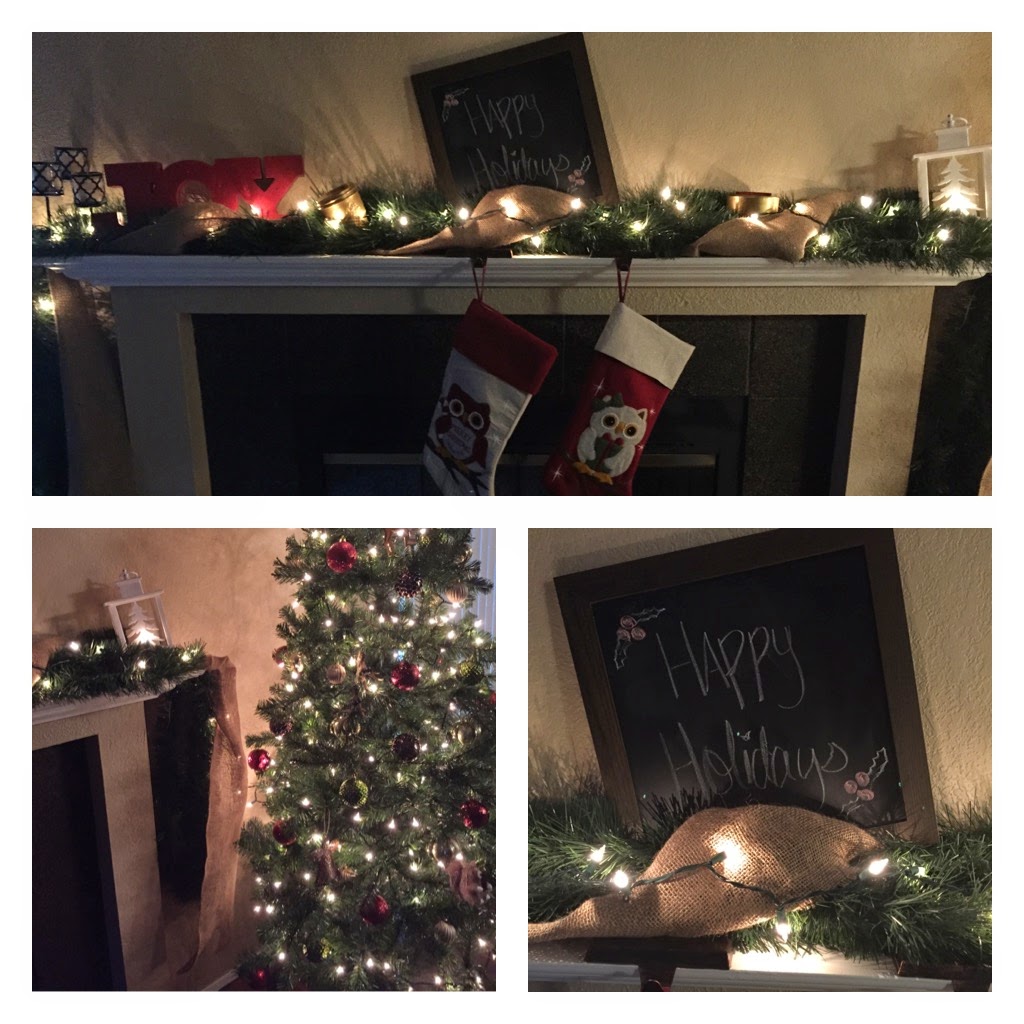
Starting off, here is a little bit of an overview of what most of our Holiday Decor looks like! I'll be going through each item! 
 ALL ABOUT OUR TREE!
Artificial 7' Tree - Target $53
We desperately wanted a real tree for our first Christmas but in an apartment an artificial tree is much more practical, and you can have it displayed for SO MUCH LONGER than a real one! And keep it forever! Woohoo!
String Lights(300) - Walmart $7
This was the PERFECT amount of lights for this tree. We barley had enough which was great because then we didn't have to figure out what to do with the extra!  
Ornaments(50) - Walmart $16.98
I originally bought 2 of these but ended up returning one because I only needed 50.
Star Tree Topper - Walmart $8
We really loved this topper because we thought it really pulled everything together.
Individual Personal Ornaments(4) - Walmart $1.97 each


Mantle Decor!
 Garland - Target $10
This garland ended up being SOO long when we took it out of the package, but it ended up being perfect! We folded it 3 times then laid it across the mantle, cutting the loops in the end making 3 separate strands.  
Burlap - Walmart $7
We ended up cutting this burlap piece in half long ways so we had 2 skinny pieces, then wrapped it around the garland!
String Lights(50) - Walmart $4
This was the PERFECT amount of lights. We ended up just laying the lights on top of the garland instead of wrapping it.  
Stockings - Walmart $8 each
 We couldn't find decently priced stockings we both really loved so we decided to stick with something that would match the colors of our decor the best out of the ones we did find!
Stocking Holders - Target $8
We picked up the Brass colored stocking holders to blend in with the garland and burlap. They work great so far! We will see how they hold up once the stockings are full with treats!
White Lantern - Target $12
I knew from the start that I wanted to get a lantern. I absolutely love this lantern and I will probably leave it up most of the year! It is battery operated and the candle inside flickers!
Chalk Board - Walmart $7
From the beginning I also knew I wanted to get a chalk board. I think they are so versatile and can be used all year round! Definitely an essential to Christmas photos also! 
Light-up JOY - Target $20
I was so over JOYED ;) when I saw this. I knew I had to have it, and I know I will be using it for years. It is battery operated.
Black Pedestal Candles - Target $10 
I previously owned these and have had them on my mantle for about a year. I absolutely love them and love the little accent it gives!
Gold Kerr Stacking Jars - Previously owned
I love reusing old jars for decor. I had these jars and painted them gold a few months ago, and I discovered they were the perfect finishing touch to my mantle decor!


Wrapping Paper!
Don't spend all your money on wrapping paper, go to the Dollar Store! I found this paper along with another that corresponds with it at the Dollar Store! So cute, festive, and classic!

So our grand total for our Holiday Decor was around $190! 

Hope you enjoyed today's post!
Happy Holidays!
 

Wednesday, November 5, 2014

Ultimate Crockpot Chicken & Dumplings


So, I've made this quite a few times, and I have discovered the Ultimate Recipe. As I've made this recipe I've tweaked things little by little to make the end result the best! Of course you can just add all the ingredients into the crockpot at the same time, "set it and forget it" but if you're looking to make the best soup possible this is the recipe for you!! It does take a little more effort than the original recipe but its so worth it!!This is such an easy way to make your home smell like you've been slaving away in the kitchen all day working on this classic meal, even though it only took you about 20 minutes of being in the kitchen. Chicken & Dumplings is the ideal comfort food, perfect for the changing weather.
ENJOY!

What you need:
  • 3-5 Thawed Chicken Breasts (can also use tenders, just use more)
  • 2 Cans Cream of Chicken Soup
  • 1 Can Chicken Broth
  • 1 Bag of frozen veggies of your choice (or fresh veggies if you prefer)
  • Pepper
  • Garlic Salt
  • 1 Canned Flaky Biscuits

Directions:  

1. Add thawed chicken, pepper, garlic salt into the bottom of your Crockpot.

2. On top add Chicken Broth & Cream of Chicken, Stir 

3. Cook on High for 2 hours or until Chicken is almost completely cooked.

4. After the first 2-3 hours, add in frozen veggies.

5. Continue cooking for 3 more hours. (if leaving it all day you can add everything all at once)

6. When chicken is completely cooked, shred with fork and knife.

7. Cut 3-4 biscuits into very small pieces and stir into soup.

8. Continue cooking for 1-2 hours

Serve and Enjoy! 

Tips:

Don't add salt!! Between the Garlic salt, and the broth there is MORE than enough salt. If you are worried about sodium, you can use no sodium added broth/cream of chicken.

I add my frozen vegetables later on in the cooking process, just because I don't want them to turn to mush, but if you are cooking your soup on Low or if you are not around to add them in later, adding it all in at the same time is perfectly fine.

Stir if you can! I know some people like crockpot meals because you don't have to stir or check on it, but I personally like to stir the soup every once in a while. Other wise you get a brown crust around the edges, which turns burnt. Stirring also helps everything cook more evenly. 

Cut your Biscuits SMALL! As they cook they expand, so keep that in mind when cutting them! A lot of these recipes I've seen say to just cut them in quarters and that is WAY WAY TOO BIG! 


Wednesday, October 15, 2014

Quick Tinfoil Fiesta Chicken


This recipe is SO simple and quick! Great for a busy weeknight! The ingredients are simple and you most likely have everything you need in your kitchen already! The salsa and tinfoil keeps the chicken moist and the flavors are amazing! This recipe is definitely a staple in my house!
Enjoy!

Ingredients:
  • 4 Chicken Breasts or Chicken Tenders Thawed (or as much needed for your family)
  • 1 Cup Salsa
  • 1 Can Mexican Corn (regular corn works too)
  • 1 Cup Grated Cheese
  • Seasoning to taste
  • Tinfoil
  • Cookie Sheet


Instructions:

PREP:
  • Preheat oven to 450
  • Cut a rectangle piece of tinfoil for each piece of chicken (large enough to make a pocket for chicken to sit in)
CONSTRUCT:
  • Lay each piece of chicken on individual tinfoil squares and season with salt, pepper & garlic salt.
  • Top chicken with Salsa & Corn making sure to cover the entire chicken.
 
FOLD:

This part can be a little confusing until you get down the folding techniques*
  • Make sure chicken is centered in the middle of the foil.
  • Take the two sides that are longer and pull to the top making a triangle (Picture 1)
  • Fold the Ends of the of the tinfoil, making a pocket.(Picture 2)
  • You should be left with an opening in the middle where you later open and add cheese. 
  • Place all the individual pockets of chicken on a cookie sheet.(Picture 3)
 
BAKE:
  • Bake for 18-22 minutes or until chicken is fully cooked
  • Open Tinfoil and add cheese to the tops of each chicken breast.
  • Reseal the top of the tinfoil and put back into the oven until cheese is melted (about 5 minutes)
 
SERVE:
I love serving this dish with mashed potatoes. Its quick and easy and very filling! You can make your own mashed potatoes or use store bought instant potatoes!


Hope you enjoyed today's post!